
Create Vagrant boxes easily using Packer

A few months ago, I wrote a post to explain how to easily create a local Kubernetes cluster leveraging Vagrant and Traefik. You can find it here:
 Teddy FERDINAND
Today, I suggest to see how we can accelerate this creation by building ourselves the box used by Vagrant, preconfigured with our tools. This post is the continuation of the one above. Some notions will not be discussed again.
What is Packer?
Packer is also a HashiCorp tool, like Vagrant. Its role is to pack (hence its name) virtual machines.
It allows you to create AWS AMIs, Docker images, VirtualBox virtual machines and so on. You can find the complete list of providers managed by Packer here.
The main strengths of Packer are :
- The simplicity of the configuration: a simple JSON or HCL file can describe the desired build
- Parallelization: you can create the same image on several providers in parallel, very useful in a multicloud approach
- Reproducibility: It is easy to recreate an OS image from scratch, using only the Packer files, which allows sharing only these files, rather than large images
Today, we will create a Vagrant box starting from the basic Ubuntu server ISO.
Why use Packer to create Vagrant boxes?
If we go back to my previous post, we had seen how to quickly start a K3S cluster with Vagrant. However, on each virtual machine :
- I had to download K3S or Traefik
- I had to do my SSH configuration (for the trust between nodes)
- I couldn't make sure that the version of K3S and the set of binaries was exactly the same from one run to another. (I'll come back to this point)
So, to solve this problem, I will be able to use Packer to create boxes directly configured to meet my needs.
This will allow me to start my cluster more quickly and not to have to download and configure everything at each launch.
What are the steps to create the box?
First, we will create a configuration file for Packer. This file can be written in JSON or in HCL (since recently), the language specific to HashiCorp tools. For this project I arbitrarily chose HCL. Note that JSON can perform exactly the same actions. This file will allow us to indicate the basic ISO that we will use, as well as all the necessary actions until the creation of the box.
Then we will provide this configuration file as input to Packer which will do the following operations:
- Download the image of the requested OS
- Check the checksum of the image
- Create a virtual machine to launch the image
- Execute the installation commands
- Execute the machine provisioning commands
- Shut down the VM
- Export as Vagrant box
- Delete the temporary VM
These operations will be done in a completely transparent way, on our side, we will only run one command.
Hands in the mud !
As a preamble, you can find all the scripts described below on the associated repository :
 teddy-ferdinand
First, you will need Packer and Vagrant. For Vagrant, I invite you to look at my previous post to know how to install it. Concerning Packer, I invite you to look at the dedicated page on the editor's website in order to have the most adapted installation to your operating system.
To make my box, I chose to have three files :
├── http
│   └── preseed.cfg
├── packer_installer.sh
└── packer.pkr.hcl
So we have :
- An http directory: this directory will be exposed as a web server by Packer to be able to directly operate a network installation to preconfigure the OS. I will come back to this point in the configuration.
- A packer_installer.sh script : this script contains the basic provisioning of the image, e.g., the installation of K3S, traefik and the deployment of my SSH keys
- A configuration file packer.pkr.hcl : This file is the configuration file that we will use with Packer to create our box. Warning: the .pkr.hcl extension is necessary for Packer to detect the right format; otherwise it will try to process it as JSON.
The Packer configuration
Let's start with the Packer configuration file. This is the file that will define our box.
First of all, we have the first section: the source. As its name indicates, this element allows us to indicate which image we have to start from for the build, as well as the basic configuration (login, commands to be executed at boot time, etc.).
source "virtualbox-iso" "ubuntu" {
  guest_os_type = "Ubuntu_64"
  iso_url = "http://cdimage.ubuntu.com/ubuntu/releases/bionic/release/ubuntu-18.04.5-server-amd64.iso"
  iso_checksum = "sha256:8c5fc24894394035402f66f3824beb7234b757dd2b5531379cb310cedfdf0996"
  ssh_username = "packer"
  ssh_password = "packer"
  ssh_port= 22
  shutdown_command = "echo 'packer' | sudo -S shutdown -P now"
  http_directory = "http"
  guest_additions_mode = "disable"
  boot_command = [
        "",
        "",
        "",
        "/install/vmlinuz",
        " auto",
        " console-setup/ask_detect=false",
        " console-setup/layoutcode=us",
        " console-setup/modelcode=pc105",
        " debconf/frontend=noninteractive",
        " debian-installer=en_US",
        " fb=false",
        " initrd=/install/initrd.gz",
        " kbd-chooser/method=us",
        " keyboard-configuration/layout=USA",
        " keyboard-configuration/variant=USA",
        " locale=en_US",
        " netcfg/get_domain=vm",
        " netcfg/get_hostname=packer",
        " grub-installer/bootdev=/dev/sda",
        " noapic",
        " preseed/url=http://{{ .HTTPIP }}:{{ .HTTPPort }}/preseed.cfg",
        " -- ",
        ""
      ]
}
In this part, we find :
- The base image: Ubuntu 18.04.5
- The checksum of the image, this will allow Packer to control the integrity of the image after its download
- The logins and passwords to use in SSH (which will be used in the second part)
Which command should be run to shut down the machine properly - The http directory, which allows exposing a preseed file that carries the basic configuration of my image. You can find it on line 32.
- The fact that I disable the installation of the guests additions. The guests additions allow a better integration between the host and the VM, in our case, I don't need them, so I might as well not install them.
- Finally, we find the commands launched at boot time. These commands will be launched in "emulation" mode. This means that Packer will emulate a keyboard to type these commands in your virtual machine.
Concerning the commands launched at build time, I was inspired by a repository containing basic Packer configurations:
geerlingguyStill in this same configuration file, we have a second block, the "builder". As its name indicates, the role of this block is to build our box. Let's see its content.
build {
    sources = ["source.virtualbox-iso.ubuntu"]

    provisioner "file"{
        sources = [".ssh/id_rsa", ".ssh/id_rsa.pub"]
        destination = "/tmp/"
    }

    provisioner "shell"{
        script = "./packer_installer.sh"
        execute_command = "echo 'packer' | sudo -S -E sh -c '{{ .Vars }} {{ .Path }}'"
    }

    post-processor "vagrant" {
        keep_input_artifact = false
        provider_override = "virtualbox"
    }
}
Those who are used to HCL will see that the source is a direct reference. This means that Packer natively solves a dependency link between the two elements.
Then we can see that I use "provisionners," the role of these elements is precisely to do the provisioning, there are dozens. It is for example possible to use Ansible to do its configuration.
You can find the complete list of provisioners here: https://www.packer.io/docs/provisioners.
For my part, I chose to use two of them:
- I copy my SSH keys that I have generated in my virtual machine
- I then run an installation script that I made, note the invocation of sudo for the launch. By default Packer runs the commands via the user specified in sources.
Finally, I have a "post-processor", the role of this element is to export my box once the configuration of my virtual machine is finished. In my case, the export is Vagrant, which means that packer will create a box vagrant from the Virtualbox virtual machine. As for providers and provisioners, there are many post-processors: https://www.packer.io/docs/post-processors
The installation script
As we have seen above, I have a small Shell script that is invoked to perform the provisioning of my machine. Here is the content of this script, which is quite basic.
#!/bin/sh
# Deploy keys to allow all nodes to connect each others as root
mkdir /root/.ssh/
mv /tmp/id_rsa*  /root/.ssh/

chmod 400 /root/.ssh/id_rsa*
chown root:root  /root/.ssh/id_rsa*

cat /root/.ssh/id_rsa.pub >> /root/.ssh/authorized_keys
chmod 400 /root/.ssh/authorized_keys
chown root:root /root/.ssh/authorized_keys

# Install updates and curl
apt update
apt install -y curl
# Apt cleanup.
apt autoremove -y
apt update

#  Blank netplan machine-id (DUID) so machines get unique ID generated on boot.
truncate -s 0 /etc/machine-id
rm /var/lib/dbus/machine-id
ln -s /etc/machine-id /var/lib/dbus/machine-id

# Download k3s
curl -L https://get.k3s.io -o /home/packer/k3s
chmod +x /home/packer/k3s

# Download Traefik
curl -L https://github.com/containous/traefik/releases/download/v2.2.11/traefik_v2.2.11_linux_amd64.tar.gz -o /home/packer/traefik.tar.gz
cd /home/packer
tar xvfz ./traefik.tar.gz
rm ./traefik.tar.gz
chmod +x /home/packer/traefik
At first, we can find the deployment of my SSH key. When we were running Vagrant, it was him who did this installation. Now Packer does it for us. This will also allow us to connect directly using these keys.
Then I update my packages and install curl, because the image I use is a "minimal" image without this package. Then I clean up the useless packages. Besides the aspect of a clean installation, it allows reducing the size of my box.
A small cleaning is then done so that our machine does not have an identifier linked to it, a very important point for Vagrant, without which we can have conflicts between our virtual machines.
Finally, I download K3S and Traefik, which I put in /home/packer. This will allow Packer to use them directly.
The preseed file
This file is probably the most "raw", but very important, because it is the one that will perform the installation of the base of our machine.
d-i base-installer/kernel/override-image string linux-server
d-i clock-setup/utc boolean true
d-i clock-setup/utc-auto boolean true
d-i finish-install/reboot_in_progress note
d-i grub-installer/only_debian boolean true
d-i grub-installer/with_other_os boolean true
d-i partman-auto/disk string /dev/sda
d-i partman-auto-lvm/guided_size string max
d-i partman-auto/choose_recipe select atomic
d-i partman-auto/method string lvm
d-i partman-lvm/confirm boolean true
d-i partman-lvm/confirm boolean true
d-i partman-lvm/confirm_nooverwrite boolean true
d-i partman-lvm/device_remove_lvm boolean true
d-i partman/choose_partition select finish
d-i partman/confirm boolean true
d-i partman/confirm_nooverwrite boolean true
d-i partman/confirm_write_new_label boolean true
d-i pkgsel/include string openssh-server cryptsetup build-essential libssl-dev libreadline-dev zlib1g-dev linux-source dkms nfs-common
d-i pkgsel/install-language-support boolean false
d-i pkgsel/update-policy select none
d-i pkgsel/upgrade select full-upgrade
d-i time/zone string UTC
tasksel tasksel/first multiselect standard, ubuntu-server

d-i console-setup/ask_detect boolean false
d-i keyboard-configuration/layoutcode string us
d-i keyboard-configuration/modelcode string pc105
d-i debian-installer/locale string en_US.UTF-8

# Create packer user account.
d-i passwd/user-fullname string packer
d-i passwd/username string packer
d-i passwd/user-password password packer
d-i passwd/user-password-again password packer
d-i user-setup/allow-password-weak boolean true
d-i user-setup/encrypt-home boolean false
d-i passwd/user-default-groups packer sudo
d-i passwd/user-uid string 900
These include, but are not limited to:
- The configuration of the language and the keyboard layout
- The partitioning of my disks
- The basic packages to install
- The creation of my user "packer
Let's launch it all!
Once we have all our files, we can launch the construction of my Vagrant box with packer with a simple :
packer build packer.pkr.hclAs you can see below, this takes a few minutes and will perform all the actions I mentioned earlier.
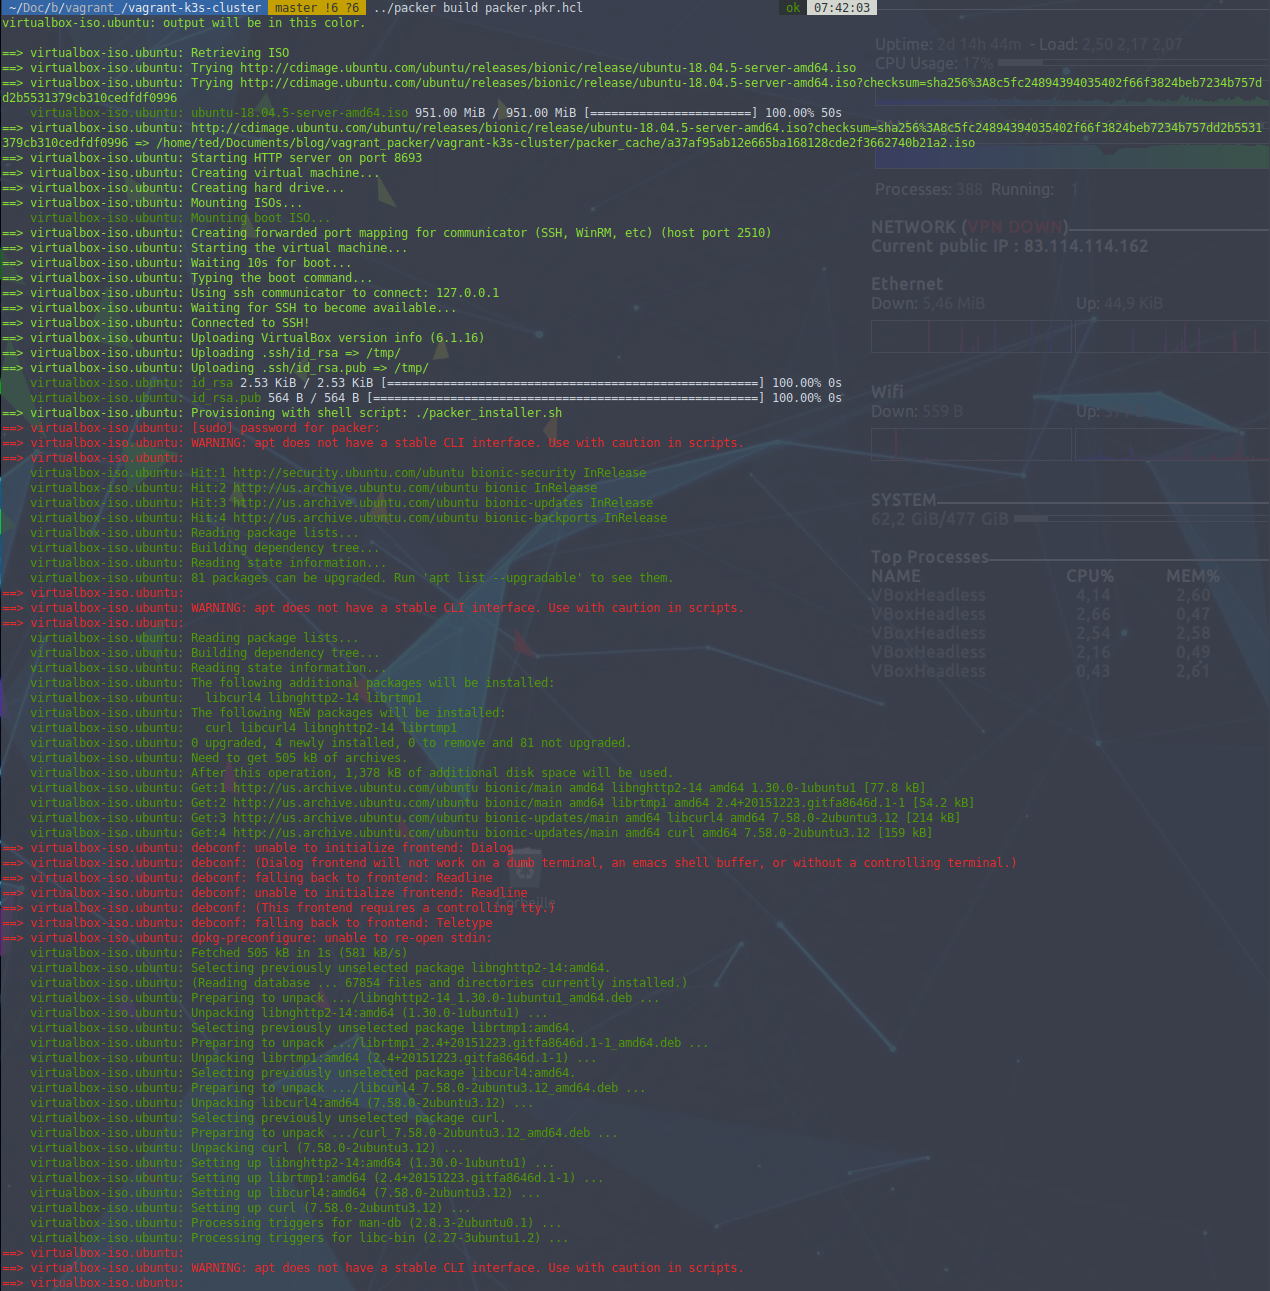
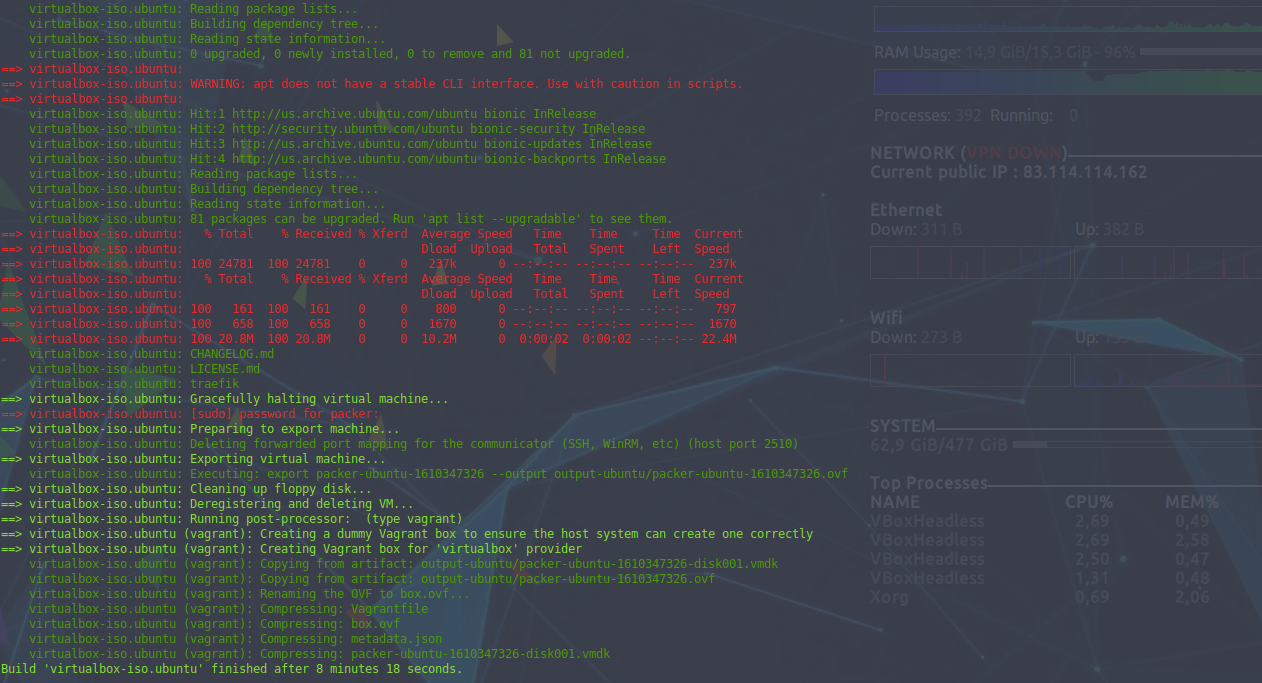
Once it is finished, we have a box "packer_ubuntu_virtualbox.box" in our current directory. During the execution, we can see the Virtualbox window, this is a choice I made. It is possible to disable its display by adding
headless = truein my source.
Using this box in Vagrant
Now that my box is created, I can use it in Vagrant. The basic scripts are very similar to the original ones, except that :
- I don't start from a public Ubuntu box anymore, but from my local box
- I don't need to deploy my RSA keys anymore
- I use the connection via the RSA key instead of the native vagrant login
- I don't need to download K3S and Traefik anymore
- I disable the synchronization of the Vagrant directory that I don't use, since it requires the use of the "guests additions" that I haven't installed
So here is the file in question :
MASTER_COUNT = 3
NODE_COUNT = 3
IMAGE = "packer_ubuntu_virtualbox.box"

Vagrant.configure("2") do |config|

  (1..MASTER_COUNT).each do |i|
    config.vm.define "kubemaster#{i}" do |kubemasters|
      kubemasters.vm.box = IMAGE
      kubemasters.vm.hostname = "kubemaster#{i}"
      kubemasters.vm.network  :private_network, ip: "10.0.0.#{i+10}"
      kubemasters.vm.provision "shell", path: "scripts/master_install.sh"
      kubemasters.ssh.username = "root"
      kubemasters.ssh.private_key_path = ".ssh/id_rsa"
      kubemasters.vm.synced_folder '.', '/vagrant', disabled: true
    end
  end

  (1..NODE_COUNT).each do |i|
    config.vm.define "kubenode#{i}" do |kubenodes|
      kubenodes.vm.box = IMAGE
      kubenodes.vm.hostname = "kubenode#{i}"
      kubenodes.vm.network  :private_network, ip: "10.0.0.#{i+20}"
      kubenodes.vm.provision "shell", path: "scripts/node_install.sh"
      kubenodes.ssh.username = "root"
      kubenodes.ssh.private_key_path = ".ssh/id_rsa"
      kubenodes.vm.synced_folder '.', '/vagrant', disabled: true
    end
  end

  config.vm.define "front_lb" do |traefik|
      traefik.vm.box = IMAGE
      traefik.vm.hostname = "traefik"
      traefik.vm.network  :private_network, ip: "10.0.0.30"
      traefik.vm.provision "file", source: "./scripts/traefik/dynamic_conf.toml", destination: "/tmp/traefikconf/dynamic_conf.toml"
      traefik.vm.provision "file", source: "./scripts/traefik/static_conf.toml", destination: "/tmp/traefikconf/static_conf.toml"
      traefik.vm.provision "shell", path: "scripts/lb_install.sh"
      traefik.vm.network "forwarded_port", guest: 6443, host: 6443
      traefik.ssh.username = "root"
      traefik.ssh.private_key_path = ".ssh/id_rsa"
      traefik.vm.synced_folder '.', '/vagrant', disabled: true
  end
end
As you can see, no huge changes here from my original script.
The real changes are in the Vagrant deployment scripts.
K3S installation
Installing the master
#!/bin/sh

# Add current node in  /etc/hosts
echo "127.0.1.1 $(hostname)" >> /etc/hosts

# Get current IP adress to launch k3S
current_ip=$(/sbin/ip -o -4 addr list enp0s8 | awk '{print $4}' | cut -d/ -f1)

# If we are on first node, launch k3s with cluster-init, else we join the existing cluster
if [ $(hostname) = "kubemaster1" ]
then
    export INSTALL_K3S_EXEC="server --cluster-init --tls-san $(hostname) --bind-address=${current_ip} --advertise-address=${current_ip} --node-ip=${current_ip} --no-deploy=traefik"
    export INSTALL_K3S_VERSION="v1.16.15+k3s1"
    sh /home/packer/k3s
else
    echo "10.0.0.11  kubemaster1" >> /etc/hosts
    scp -o StrictHostKeyChecking=no root@kubemaster1:/var/lib/rancher/k3s/server/token /tmp/token
    export INSTALL_K3S_EXEC="server --server https://kubemaster1:6443 --token-file /tmp/token --tls-san $(hostname) --bind-address=${current_ip} --advertise-address=${current_ip} --node-ip=${current_ip} --no-deploy=traefik"
    export INSTALL_K3S_VERSION="v1.16.15+k3s1"
    sh /home/packer/k3s
fi

# Wait for node to be ready and disable deployments on it
sleep 15
kubectl taint --overwrite node $(hostname) node-role.kubernetes.io/master=true:NoSchedule
As you can see, no more key deployment, no more K3S download. I just configure my host and launch directly K3S which is already in my box.
The command line arguments (INSTALL_K3S_EXEC) are exactly the same.
You may notice that I set the K3S version using the INSTALL_K3S_VERSION environment variable, this is because recent versions of K3S use a default RSA key authentication which I could not get to work with Traefik. Even with the right password, I couldn't get the basic authentication to work either. So I chose to point to the version I used last September for this post.
I'll probably do a post on this point when I've found a solution.
Installation of worker nodes
#!/bin/sh
# Add current node in  /etc/hosts
echo "127.0.1.1 $(hostname)" >> /etc/hosts

# Add kubemaster1 in  /etc/hosts
echo "10.0.0.11  kubemaster1" >> /etc/hosts

# Get current IP adress to launch k3S
current_ip=$(/sbin/ip -o -4 addr list enp0s8 | awk '{print $4}' | cut -d/ -f1)

# Launch k3s as agent
scp -o StrictHostKeyChecking=no root@kubemaster1:/var/lib/rancher/k3s/server/token /tmp/token
export INSTALL_K3S_EXEC="agent --server https://kubemaster1:6443 --token-file /tmp/token --node-ip=${current_ip}"
export INSTALL_K3S_VERSION="v1.16.15+k3s1"
sh /home/packer/k3s
We find here the same logic: no more download, basic configuration of the host and direct launch of K3S.
Traefik installation
The Traefik virtual machine is reduced to launching the binary directly by using the configurations pushed by Vagrant.
#!/bin/bash
# Run Traefik as a front load balancer
/home/packer/traefik --configFile=/tmp/traefikconf/static_conf.toml &> /dev/null&
We run the whole thing
So we have everything we need to launch the deployment with Vagrant with a simple
vagrant upAs for my previous post, after a few minutes my cluster is online. It is possible to check that everything works well with the following commands:
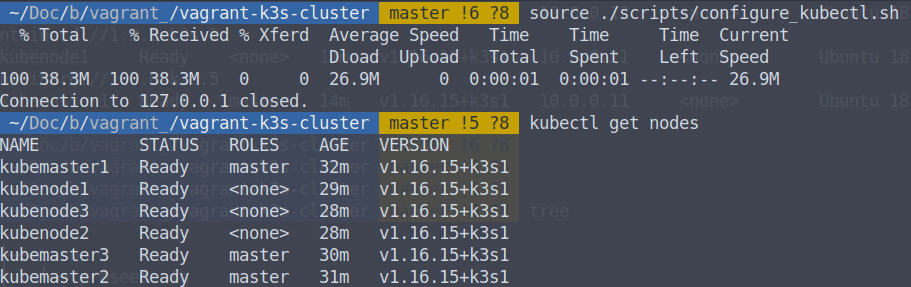
source ./scripts/configure_kubectl.sh
kubectl get nodes
You should get a return similar to this one:
To conclude
This article stays on a very basic use of Packer. The tool is very powerful and allows you to have multiprovisioning approaches in a very simple way. Moreover, the strength of Packer, like most of the infra as code tools, is its reproducibility: it is very easy to recreate identical base images without having to share files of several hundred MB.
Like many of HashiCorp's tools, the language is quite high level and very accessible. As for me, it took me an hour to make my first VM from scratch a few years ago using Packer.
Don't hesitate to react via the comments if you have any questions or remarks !


Comments ()